Wednesday, 12 March 2014

Making Handmade Pocket Invitations For Half The Price Of Professionals Part 3

Hello Everyone,

I'm so sorry for only just doing part 3, I've had this awful flu that's been going around and slept for about 24 hours solid, but I still can't shift it. But to make the cherry on top my computer decided to hate me, but making my profile corrupt, I didn't even know that could happen! If I could afford a new laptop I would never have a Dell Inspiration again, I've had Dell out to fix 7 times in 4 years, the mother board has died 3 times and it just generally doesn't like life! But i'm getting off topic, so lets look into the assembly of these invites!


I previously mentioned the construction of the pocket envelope (I hope I did), if not it's pretty simple with the use of double sided tape. I also mentioned how I worded the invite section but remember its your invite write it how you like!

To go with our invite we chose to do 4 side information points with, Accommodation, Directions, RSVP and General Information.


We're quite lucky with our venue Crewe Hall, as it literally down the road from the train station which means it is surrounded by hotels. Of course our top hotel was the wedding venue in which our guest get 10%, but we also included a selection of well known branded hotels, such a Holiday Inn, Premier Inn and we included the web address and phone number, but I did not include the price as this is constantly changing. I think accommodation is pretty much your choice most people do put it out there, as it stops every single guest contacting you for hotel information so it just saves you a lot of phone calls, emails and text messages.

For the Directions a simple map which you can steal from Google maps is needed, but most places with give you simple instructions, we have included the post code for Sat Nav users, but we also included instructions, we tested a few times and got double checked by my dad, just remember not everyone uses Sat Nav and not everyone will use the internet to search some family members will pull out a map!

Our RSVP, has a very typical yes or no, but word it nice I know its easy to be flippant about people not coming to your wedding, so we worded it the best we could think of and for the returning address we put my parents down. Because it is an invite addressed from them, the RSVP's should be sent back to them, but we have put down an email address, for those who do not want to send through the post. But don't be surprise if you get an RSVP through Facebook and text.

We have included Dietary/Allergy requirements on the RSVP and it has in some way worked, but were shocked that some family members who we know are Vegetarian haven't declared it. In an ideal world I would serve them meat and say well you didn't specify but that's not productive and slightly Bridezilla like! I am also shocked people I know who are diabetic haven't said so use your logic with it some people don't say they assume you'll know. We've also had problems with people not RSVPing because they think we wanted it on the 30th May because we stated that was to be the latest date. The joys of wedding planning.

You will notice that our RSVP is in 2 halfs, why you ask well its the same with our Directions because my printer also hates me and wouldn't print perfect back to back, so I made it simple and printed individual and stuck together.

General Information, well this is more a personal choice than a necessity. We have chosen to registrar with 2 different places for gifts simply because we did not want half a million picture frames, or 2 toasters so we wanted to have more control and choice on what we had. So we are typically registered with John Lewis (but you can go with Debenhams, House of Fraser, Selfridges, any larger department store). But we also went with Wedgewood, so a nice mix all the this information needed to be visible and accessible so the starter for our card. We also included my dad's mobile number, simply because if you need to get in touch with someone, because your guests are lost, running late anything you can think of i'm definitely not answering my phone and i'd be surprised, no it would be a miracle if mike answered his phone. Plus who knows my home town better than my dad right?


Once these have all been cut, they should fit nicely into the pocket and I think look nice and professional.  Now that the inside of the card is finished its just the outside design, which can be as simple and as complicated as you like.


 We opted for a ribbon design, with a sliver mesh background then a teal (peacock according to Ebay) on top, once again double sided sellotape is your best friend!


To close the invite we used round velcro dots, really easy to use as they are self adhesive. I found it easier to apply the dot on the ribbon first and then place the matching dot on top of the current one to make it stick perfect.


Like so!

To decorate the front, I cropped a small piece of the flock wall paper to create a stylish opener, you'll have to tell me what you think!


We thought it look very effect and just gave it that nice finishing touch!


So here it is after 3 blogs, the finished invitation, for half the cost and just as professional looking! I hope you agree, all our friends and family couldn't tell the difference.

Let me know how it works out for you guys.

Bye
XXXX 

Sunday, 23 February 2014

Making Handmade Pocket Invitations For Half The Price Of Professionals Part 2

Hello Everyone,

Right are we ready to actually make the invites? Well lets get started!

Making the Outer Pocket is really easy and simple, as it is just an A4 piece of card folded
 into 3! For this we used the White Ice Diamond Lustre Card, as well as for the Inner Pocket. You will notice I am using Windows Microsoft Publisher, which I used for everything but the flock pattern, but well will get to that! Here is a useful hint for this part, because you don't want these lines to be obvious use a grey line then when you print, print as a draft you'll be saving ink at the same time.


On publisher it will look like this!


To this when it is folded! So good so far!

So for the Inner Pocket, for this bit you will have to start cutting, if you can cut a straight line with a pair of scissors, give yourself a pat on the back! If your like me and can't cut a straight line save your life your going to need a paper trimmer, or the cheap options, an old chopping board, a Stanley knife and ruler. Remember always cut away from yourself, if your the Bride you need to be alive for your wedding if your the wedding party, "What are you doing adding more stress to the time? Come on be sensible!" If your like me make sure someone else is in the house who can drive and knows where the nearest A&E is and first aid box!
It's a bit more complicated due to the folding, but remember our advise from the previous pocket and here it is the Publisher image and when it is folded! Simple right?


Now put a layer of Double sided on the flaps and stick the the right side of the Outer Pocket and you have completed your pocket for 25p each! Take that Hobby Craft and Ebay! These are prices all our price aware Grooms will love! If you want to argue this point look at the prices I pointed out in part 1 http://disneygirlgrowsup.blogspot.co.uk/2014/02/making-handmade-pocket-invitations-for.html

Now this is the stage where you need to concentrate a bit more, as this is the pretty side of the design. I used Adobe Photoshop CS3, as I had it during my Photography A-Level and I swear by it! If you want this design aspect desperately and don't want anything simple then ask your friends if they have it or see if you can get hold of a demo and be cheeky, but I only used this to create a small section then I created an A4 sheet on Publisher!

Google Flock Pattern and look at all the designs you get! 


So I selected my favorite pattern and placed it in the center of an A4 page, this will make it easier for me to draw over using the Pen Tool. The reason I did this was because the picture quality is poor and I only want the white pattern not the black background! 


This is how the design will look once I drew over it and with the color I liked remember it does look different when printed to how it looks on the screen, if your clever enough to buy your ribbon before hand (unlike me) you can scan a piece of that in and take the color from that unfortunately I just landed lucky.


To be honest the next step is simple. Save the image as a jpeg at the highest level you can, the higher quality the better, then open in publisher copy and paste until you fill a whole page then group together and save as a jpeg again! I'm not going show you how to do that again, as i'm guessing your considering to make your own you know the basics of publisher.

For the Invite, we used the "Three Sheet" White Card .This is a bit where you need to discuss what is going to be written, there is wedding invitation politics at play here. Remember this, who is the invite from? Your parents, the Brides parents, you? Are your parents divorced and re-married it's all out there! But there are plenty of websites that will tell you what is best to write and how to write it!

We went with the Classic Invite writing! 

Our invites read as:

Mr and Mrs Dads Name and Sure Name
request the honor of the presence of
..................................................
at the wedding of their daughter 
Rebecca Ellen (yes middle names for this bit!)
to 
Michael full name Bowley 
on Date
at Time
at
Place (if this is at a church state that!)
with a Reception following at
RSVP (EXTREMELY IMPORTANT)
and we put a by date!


I created this easily on Publisher by creating a shape box in size I needed, putting my flock behind it, cropping to the right size, putting a white box on top giving it a 1 cm boarder and then a text box on top!

I wrote all the names of our guest before I stuck the insert in as I didn't want to indent the Outer Pocket and if you make a mistake its easier to amend this way!

Then stick it in the middle section and were half way there!

In the next blog we'll look at the individual inserts and finalizing! 


See you soon! xx

Friday, 21 February 2014

Making Handmade Pocket Invitations For Half The Price Of Professionals Part 1

Hello There My Lovely's, 

I know I have been naughty not blogging for a while, but I have been working on soooo many projects and this is just one of the them, so bare with me while it is in parts, but it will be worth it trust me!


So are you at the point where you've seen so many beautiful invites but have been told the cost per one and now in a high street card shop looking depressed at the options, never fear I have a solution! 


I fell truly in love with the pocket style invites but not the price! By a professional stationary person you'll be looking between £2.50-£3.50 per invite, which I understand due to the time and effort each one takes. But you might think well I'll look online, unfortunately you'll be paying more for online companies around £3.75-£4.50 per invite some places higher, but as with most things the more you buy you get a deal, such as £10 off. So if I took the average price say £3.25 and 60 of them made (my figure of needing) it would cost me £195.00 just for the invitations, but remember the added cost on top for the envelopes, stamps and you would want to match your invites to the place cards, table plan and menus, so do think of the costs that could be added. Stamps is very important, especially in England as the price are increasing every month it feels like and these types of invites require a large stamp, we sent them second class at 60p a go! So if your happy to spend £500 for stationary go ahead, go crazy, but if you want to do it for the price and have something you've done yourself this is how!


Now don't be fooled into thinking I can buy it cheap online, as this might not be the case! On Ebay the average price for a blank card is £1.54 per invite, with the cheapest I found being in America at £1.10 per invite, but remember you would have to pay shipping, but even at this low cost that £66 for 60. I became excited to see Hobby Craft sold them in packs of 8 at £8.49, making it only £1.06 per invite but for 60 I would have to buy 13 packs which would cost £110.37 just for the pocket! I know this all seems ok and wondering why I am complaining but remember all these figures are just for the pocket, you would still need to buy the inserts, decoration, envelopes and if your using you own printer ink!


So what is the cheap option? Buy A4 card! And the amazing thing is card comes in so many colors, effects and thickness.


So I'll get the the point we spent £98.55! But this does not include the sweets and chocolates I went through making them!


How did we do it? Before we brought anything we looked for design ideas, go to the wedding fairs, look online and then all you have to do is think logical and be creative. You have your ideas so sit and make them using cheap paper and crayons. Decide what you like and make 4 or 5 different types, then keep making the same one you like until you think you've perfected the design.


We brought our paper from a company in Nantwich, called Alexander Paper Supplies and of course the magical Ebay. Here's a break down of our £98.55.


100 Sheets of White Ice Diamond Lustre Card    £20.24
100 Sheets of "Three Sheet" White Card  £11.94
100 White C5 Envelopes £  8.75
Velcro Spots £  5.49
Teal Ribbon £  7.84
Silver Ribbon  £10.00
Double Sided Tape  £  5.00
Color & Black Ink £29.90
                                                                                 
We brought 2 of the 100 Sheets of "Three Sheet" White Card to make our place cards and menus with and we thought it would be easier to just have it in.


Now I made our slowly over the course of 3 months, as my Bridesmaids live in Liverpool, my parents in Stoke and Mike got a tad bored after he was finished cutting, the Best Man only managed to make 5! If you have a team nearby this will take no time, but it does all depend how dedicated you feel, I only made 10 at a time, plus I was house hunting.


In the next blog I will take through the computer work and construction! 


See you soon! xx

Wednesday, 8 January 2014

New Year, New Plans

Well it's here 2014!

As I've previous mentioned it is a big year for me, we are 9 months away from the wedding. So I will of course be chatting some more about that and hopefully a review about the people I used.

So I decided I would share with you my plan for this year and we'll see how well I actually do!

1. Decorate my Dining Room. I know this might sound simple but it also involves restoring antique furniture, making curtains etc. I'm currently on the search for Wallpaper, which we can't decide on yet!


2. Plan my Bridal Shower which is at the end of March, I currently have no ideas of what it entails and what people are expecting, which means perfect blog material.

3. Actually plan the rest of the wedding, so much to do, so little motivation right now to do it! I'm sure things are not going to get any easier and I need to crack the whip so to speak! 

4. Make my hen party outfit, which is also at the end of March.

5. Think and make some Christmas crafts for my first Christmas in my house and hopefully with a Dining Room that is functional!

6. I do not really want to talk about weight but I kinda need to loose half a stone for my wedding dress, damm these chocolate biscuits taste so good, and people brought loads at Christmas.

7. Review my blog on what I have learnt about getting married.

8. Try to play less of The Sims 3, (I know I'll either have people booing or cheering about this) but I maybe should stop playing this and actually plan a bit of the wedding or do something constructive in my house.

9. Try to get out a bit more, last year was spent making invites, saving money, looking at house, this year I'd actually like to spend time with my friends, do things with Mike that do not involve housework, but actually go see things/people.

10. And I guess Finally actually GET MARRIED!

I hope you have some reasonable plans for the new year, with hopes and dreams!

Becky

Tuesday, 17 December 2013

Christmas Cup Cake Recipe


Hello Everyone,

As I mentioned in my last blog I would be adding this little gem! And an added bonus for http://theicingonourcake.blogspot.co.uk/

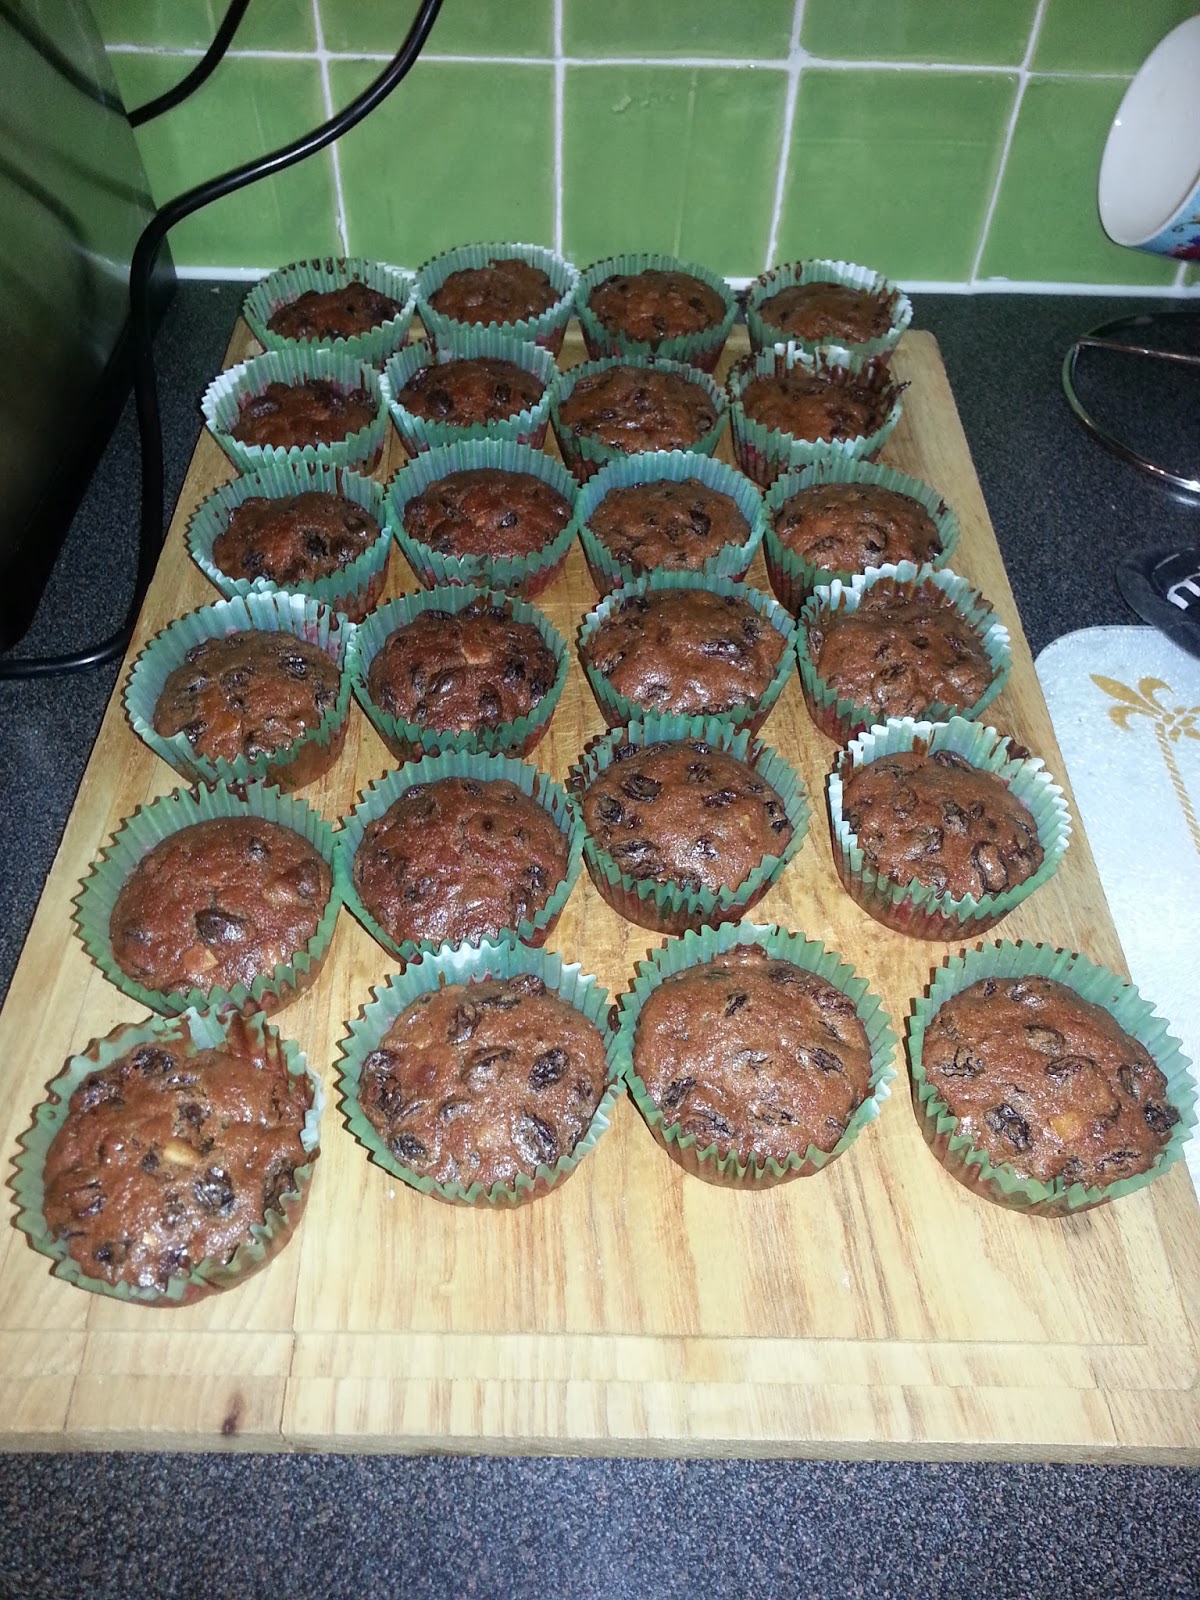
Did you miss Stir Up Sunday on the 24th November? Want to buy a Christmas Cake but don't want the whole thing? Running out of Christmas present ideas? Well here is your answer. I came across this recipe 2 years ago and have tweaked it to what I prefer. So here we go tell me what you think! And if you make enjoy!

This recipe makes 24 Cup Cakes.

My Goodies for baking.

Ingredients
  • 200g    Dark Muscovado Sugar,
  • 175g    Butter (Chopped),
  • 3          Large Eggs (Beaten in a cup),
  • 200g    Plain Flour (Seived),
  • 1/2tsp  Baking Powder,
  • 1tsp     All Spice,
  • 1tsp     Ground Cinnamon,
  • 2tsp     Ginger (Freshly Grated),
  • 2tsp     Almond Extract, or Brandy (what ever alcohol you like)
  • 1          Large Orange Zest and Juice,
  • 750g   Mixed Dried Fruit and Cherries, (I use 150g of Cherries)
You will need
  • Scales,
  • Spoons, a tablespoon and teaspoon,
  • Measuring Spoons,
  • Grater,
  • Sieve,
  • Fork (if you don't have a lemon/orange juicer),
  • Sharp Knife (to chop the cherries/cut orange in half),
  • Heavy Base Pan,
  • Wooden Spoon,
  • Mixing Bowls,
  • 2x Cup Cake Pans,
  • Mug
  • and an Oven, which is the most important.
Preheat the oven at 150C or Gas Mark 3

As I know have a fan assisted oven, I will make these on the convection option (it's all new to me electric ovens) so I have put the oven on a lower temperature unlike what I cook on Gas!


First thing, is if your anything like me (or just moved into a new house) wash all your equipment, I would love the idea that I bake all the time and don't allow dust to settle on my mixing bowls but the reality is, it does. So before I bake anything I give objects that aren't used every day a good wash.

I found these wonderful cup cake cases from poundland, you heard me £1 a pack, no need for the expense of Lakeland, which I have paid out £4 for 50 before (I wish now I brought more).

Method


1:- Put your Sugar, Butter, Fruit, Ginger, Orange Zest and Juice into a large pan.

2:-Turn the heat on and slowly bring to a boil (picture on the left), stirring frequently to melt the butter.

3:-Reduce the heat and bubble gently for 10 minutes. Set to one side to cool before adding the Almond Extract, (as I'm making mine for all ages I usually don't add alcohol, but if you want to this is the stage to do it, so replace the Almond Extract, usually Brandy with Christmas Cakes).

4:- Stir in the Eggs into the Fruit, if the mixture is to hot you will scramble, I usually after 5 minutes move the mixture into a heat proof bowl to help cool it.

6:- Sift in the Flour, Baking Powder and Spices into the Fruit. Stir everything together (picture on the right).


7:- Scoop into cases and flatten tops with a hot spoon, I boil the kettle and pour boiling hot water in a mug. I then place the teaspoon in the mug to heat it.


8:- Bake for 35-45 minutes until golden and firm. Cool on a wire rack and if you have invested in one like myself then a chopping block I guess works.


Decoration

Ingredients
  • Ready to Roll Marzipan,
  • Ready to Roll White Icing,
  • Icing Sugar,
  • and Orange Marmalade 
You will need
  • Rolling Pin,
  • Brush,
  • Sieve,
  • Knife,
  • Cutter,
  • and a Pan.


Method


9:-To make life easier for myself, I got out my cookie cutters and found one that sat perfect on the cakes. And yet again wash it before properly using (pre-washed before the photo!)


10:- Follow what the packet says, which basically states, knead  before use, sprinkle counter with Icing Sugar and roll and cut.

11:- To make them stick I have used Orange Marmalade, this is where you can add more alcohol if you want but as stated I'm making it non-alcoholic. Place the Marmalade into the pan and warm slightly, using the brush, brush a small amount on the cake, enough the cover the surface but only a thin layer. The Marmalade is there as a glue not a part of it. Place the Marzipan on the cake and use your fingers to cover, don't worry if it looks perfect, this will be hidden.


12:- Follow the same idea for the White Icing. But with this try to make it perfect, but if it doesn't don't worry as you can see I have lumps where the cakes aren't flat, but there unique and homemade! This is what makes it different.

I was originally going to use chocolate stars, but after a small miss calculation I have only 24 of them and 48 cakes! So I think I will be pulling out my Cocoa Powder and attempt to dust on the cakes......Not sure yet to be honest.

To pack these I have brought 10x boxes from Ebay designed for 12 cupcakes, I choice a basic brown as they can use them again if they want as mine are presents, but for what it is don't spend a fortune, I just brought some ribbon from Poundland to and I have some labels, all you need.

So there it is, I hope you


Merry Christmas
xxxx

Friday, 13 December 2013

Were Home Owners


Well Hello Everyone,

I finally have the internet and can at last blog! Well we have finally moved into the house and to be honest in some ways it was a nightmare! When we last saw the house in August it was all so beautiful and shinny but when the previous owners left, Oh my gosh! Where to begin?! I will admit I cried, not going to lie, I felt so disappointed it was not what I expected! So as I am a fan of lists I will give you my list of -- things I have discovered when moving into a new home..


1:- Don't Be Under The Illusion! I lived in a world where I thought the the previous occupant will have kept/left the house in a good state. Yes the couple did attempt  to tidy but a lot of things were filthy and the house had a funny smell (still does, I can't get rid of it)! Also people really do hide their imperfections.

2:- Don't Trust Any One. Our house is in a perfect state, yeah right! Our house needs a complete re-wire and yes the carpets might be new but doesn't mean they fit the room!

3:- Beware Of The DIY Man! Well more like I think I can DIY! The previous owner had good intentions but lacked the skills and conviction, which meant pretty much everything is on the cheap! The highlights are.....Our kitchen is not straight its on a strange angle, 2x homemade fire places (both electric, which were scared to turn on!), faulty electrics, tiles not straight and pretty much look like they could fall off. The best has to be random wire EVERYWHERE! Not a clue what some of them belong to!

4:- Are You Really Prepared? Be prepared for the strange and unexpected! We have discovered nearly everything has been No More Nailed (our house could be the endorsement), green paint in every room and it is a nightmare to cover over! The most shocking thing we discovered there are Stanley knife blades randomly everywhere.

5:- Check The Roof In Future! Did you know its cost £200 to have a tv airel! 

6:- Internet! When you find out your key exchange date ring your future internet provider, to arrange a connection day, as it takes over a month. 

7:- You Can't Do Anything Without Internet or Land Line! Oh my days, you can't not do anything easily without the internet or a land line! Try buying your TV License on your phone or doing your meter readings! You will require the patients of a few saints! But alas here is the the 2 worst phone apps out there at number 1:- Amazon! Number 2:- HSBC!

8:- Furniture! After 4 years we pretty much have all the furniture and other things we need to make a house a home, it was worth the wait. Plus we have known so many generous people! 

The Kitchen Chaos! Not fun to walk into after a full day at work!
Living Room starting to look normal!
9:- Arguments:- We've been in the house for 2 weeks and what haven't we argued about! Everything and anything, especially Where is this? Where did you put that? Why did you out it there? Also I developed a coping strategy when moving in, let people put things where they want and move later!

10:- Pay For Extra Help! We used the company Countrywide and as first time buyer were glad! They did all the chasing around, arranged our mortgage, answered every question and pointed us in the right direction. We couldn't have done it without Laura! She was our rock during it all!

But my ultimate tip would be get a good team behind you! Our best man, helped to paint/move furniture, my mum cleaned years worth of dirt and my dad is pretty much rewiring and sorting out our windows! You need people behind you for physical and emotional support, but because of all this our house is a home in time for Christmas!

I will be blogging again next week in a festive manor! Last minute Christmas present maybe!

See you soon

xxx


Monday, 11 November 2013

Update

Hello Everyone.

I thought I would write a small update on what is happening a why I've been a little slow in writing any blogs. 

No massive news really to explain my tardiness, but we will hopefully get the keys to our new home on Friday!!!!!!!!!!!! So I will admit I've been wrapped up in the process, so my hope is write a blog about it. 

We started handing out wedding invites out, which I will also blog about! But as you guys know it is getting closer to Christmas so we have made ourselves extra busy with seeing family as well.

I also began making my hen party outfit which I will blog about I promise!

I was intending to blog about Karl Pilkington, The Moaning Of Life, which has been on Sky1, but unfortunately I've not been able find time to sit and write it, I also work full time! So please watch his first episode about Marriage, he almost gets married, plans a wedding and makes me feel safe that perhaps Rhod Gilbert is the a wonderful wedding planner. 

I hope this all makes a bit more sense, so if I am tardy in the next couple of weeks I am very sorry.

If I don't get chance to blog before Christmas

MERRY CHRISTMAS
 and 
HAPPY NEW YEAR

2014 is an exciting one for us!

Also I would like to take this opportunity to Congratulate http://theicingonourcake.blogspot.co.uk/, Who is going to be a mummy again in April! Super excited for them! They are also looking for guest bloggers if anyone is interested in sharing.

Bye xxxxx